


Hey there! As a supplier of Vermiculite Insulation Pipe Brackets, I'm here to walk you through the process of installing these nifty little things. Trust me, it's not as complicated as it might sound.
What's a Vermiculite Insulation Pipe Bracket Anyway?
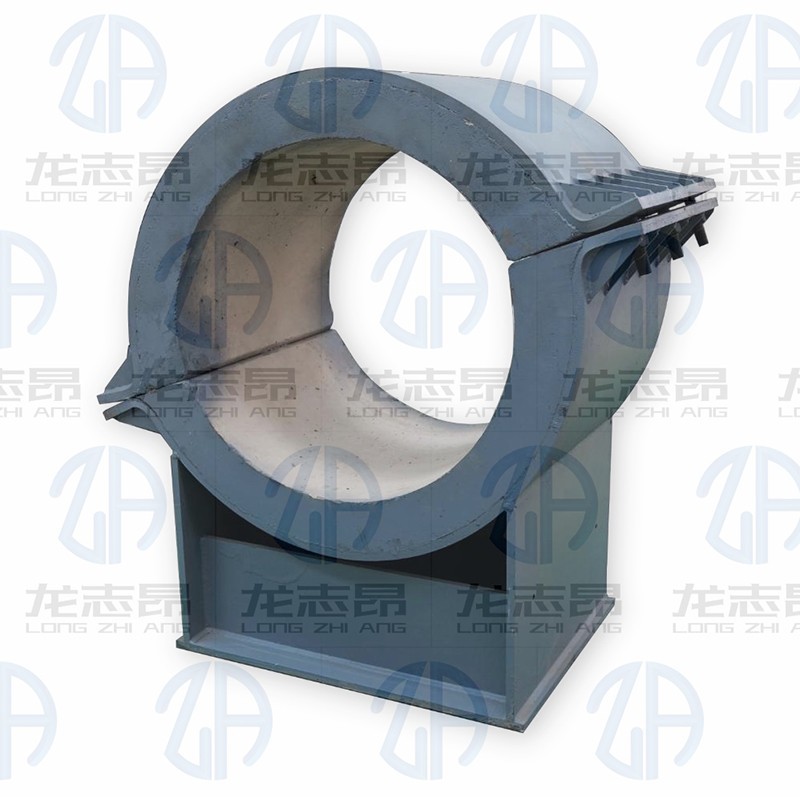
Before we jump into the installation part, let's quickly talk about what a Vermiculite Insulation Pipe Bracket is. Vermiculite is a natural mineral that has some great insulating properties. When it's used in pipe brackets, it helps to keep the temperature of the pipes stable, reduces heat loss, and can even protect the pipes from external damage.
These brackets are super useful in a bunch of different settings, like industrial plants, commercial buildings, and even some residential setups. They come in various shapes and sizes to fit different types of pipes, so you can find the perfect one for your needs. If you're interested in checking out our range of Vermiculite Insulation Pipe Bracket, just click on the link.
Tools You'll Need
Alright, let's get down to business. First things first, you'll need to gather some tools for the installation. Here's a list of what you'll typically need:
- Measuring tape: You gotta measure the pipes accurately to make sure the brackets fit just right.
- Drill: This will be used to make holes in the wall or whatever surface you're mounting the brackets on.
- Screwdriver: To tighten the screws and secure the brackets in place.
- Level: To make sure the brackets are installed straight. You don't want your pipes slanting all over the place!
- Safety gear: This includes safety glasses and gloves. Safety should always come first, right?
Step 1: Measure and Plan
The first step in any installation process is to measure and plan. Start by measuring the diameter of the pipes you'll be using the brackets for. This will help you choose the right size of brackets. You can usually find the right size based on the pipe diameter in the product specifications.
Next, decide where you want to install the brackets. You'll need to space them out evenly along the length of the pipe to provide proper support. A good rule of thumb is to place the brackets about every 3 to 5 feet, depending on the weight and size of the pipe.
Once you've decided on the locations, mark them on the wall or surface with a pencil. Use the level to make sure the marks are straight and at the same height.
Step 2: Prepare the Surface
Now that you've marked the locations, it's time to prepare the surface. If you're mounting the brackets on a wall, make sure it's clean and free of any debris or paint. If the surface is made of concrete or brick, you'll need to use a masonry drill bit to make the holes. For wooden surfaces, a regular drill bit will do the trick.
When drilling the holes, make sure they're the right size for the screws you'll be using. You don't want the holes to be too big or too small. A good way to check is to insert the screw into the hole. It should fit snugly but not be too tight.
Step 3: Install the Brackets
Once the holes are drilled, it's time to install the brackets. Take one of the brackets and align it with the holes you've drilled. Insert the screws through the holes in the bracket and into the holes in the wall. Use the screwdriver to tighten the screws, but don't over-tighten them. You just want to make sure the brackets are secure.
Repeat this process for all the brackets you've marked. Make sure each bracket is level and straight. You can use the level to double-check as you go along.

Step 4: Place the Pipes in the Brackets
After all the brackets are installed, it's time to place the pipes in the brackets. Carefully lift the pipe and place it into the brackets one by one. Make sure the pipe is centered in each bracket and sits securely.
If the pipe is too heavy to lift by yourself, you might need some help. You can also use a pipe hoist or other lifting equipment to make the job easier.
Step 5: Check for Stability
Once the pipes are in place, give them a gentle shake to make sure they're stable. If the pipes move or wobble, you might need to adjust the brackets or tighten the screws. You want the pipes to be firmly supported by the brackets.
Other Types of Insulation Pipe Brackets
While Vermiculite Insulation Pipe Brackets are great, there are other types of insulation pipe brackets out there too. For example, Magnesium Steel Insulation Pipe Bracket is another popular option. These brackets are made of a combination of magnesium and steel, which gives them good strength and insulation properties.
Another type is the Hot Insulation Pipe Support. As the name suggests, these supports are designed specifically for hot pipes. They can help to reduce heat loss and protect the surrounding environment from high temperatures.
Why Choose Our Vermiculite Insulation Pipe Brackets?
Now, you might be wondering why you should choose our Vermiculite Insulation Pipe Brackets. Well, here are a few reasons:
- Quality: We use high-quality vermiculite in our brackets, which means they have excellent insulation properties.
- Durability: Our brackets are built to last. They can withstand the test of time and different environmental conditions.
- Customization: We offer a range of sizes and shapes to fit your specific needs. If you have a special requirement, we can even customize the brackets for you.
Conclusion
So, there you have it! That's how you install Vermiculite Insulation Pipe Brackets. I hope this guide has been helpful to you. If you have any questions or need more information about our products, feel free to reach out. We're always happy to assist you.
Whether you're a professional installer or a DIY enthusiast, our Vermiculite Insulation Pipe Brackets are a great choice for your piping needs. And if you're interested in other types of insulation pipe brackets, we've got you covered too. Just click on the links above to learn more.
If you're thinking about making a purchase or have any questions about pricing, installation, or anything else related to our products, don't hesitate to get in touch. We're looking forward to working with you and helping you find the perfect insulation pipe brackets for your project.
References
- General knowledge of pipe installation and insulation products.
- Product specifications and guidelines provided by the industry.