


Installing insulated pipe supports on overhead pipes is a crucial task in various industrial and commercial settings. As an insulated pipe support supplier, I understand the importance of proper installation to ensure the efficiency and longevity of the piping system. In this blog, I will guide you through the step-by-step process of installing insulated pipe supports on overhead pipes, providing valuable insights and tips along the way.
Understanding Insulated Pipe Supports
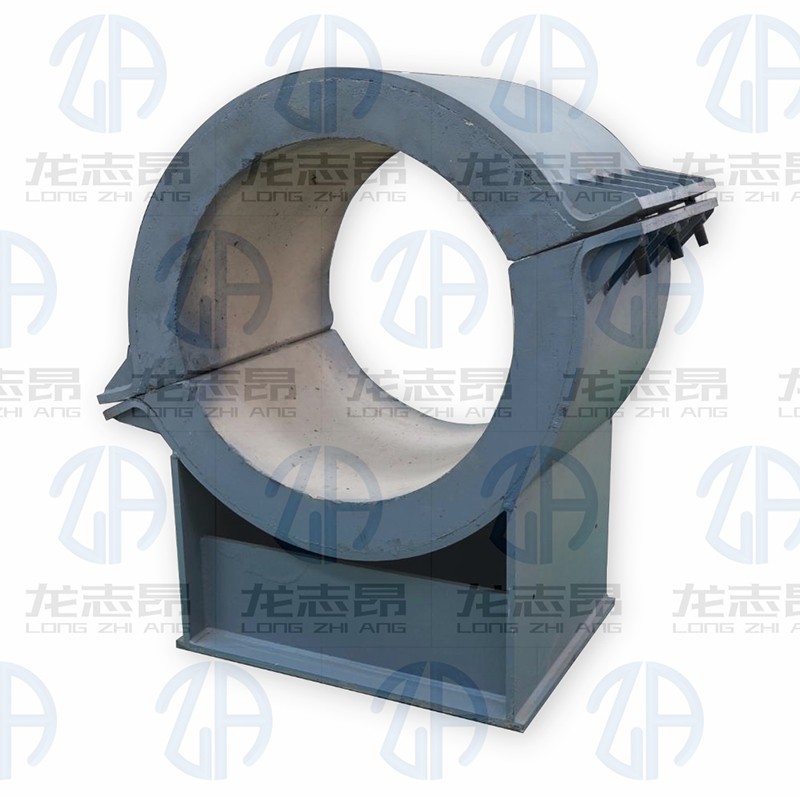
Insulated pipe supports are designed to provide thermal insulation and mechanical support for pipes. They help prevent heat loss, reduce energy consumption, and protect the pipes from corrosion and damage. There are different types of insulated pipe supports available in the market, including Steam Pipeline Insulation Pipe Bracket, Pre Insulated Pipe Supports, and Vermiculite Insulation Pipe Bracket. Each type has its own unique features and benefits, so it's important to choose the right one for your specific application.
Step 1: Planning and Preparation
Before you start installing the insulated pipe supports, it's essential to plan and prepare the installation site. Here are the key steps to follow:
- Review the Piping System Design: Carefully review the piping system design to determine the location and spacing of the pipe supports. Consider factors such as the pipe size, weight, temperature, and pressure.
- Select the Right Insulated Pipe Supports: Based on the piping system requirements, select the appropriate type and size of insulated pipe supports. Ensure that the supports are compatible with the pipe material and insulation.
- Gather the Necessary Tools and Materials: Collect all the tools and materials required for the installation, including wrenches, bolts, nuts, washers, and insulation materials.
- Inspect the Pipes and Supports: Inspect the pipes and insulated pipe supports for any damage or defects. Replace any damaged or defective parts before installation.
- Clean the Installation Site: Clean the installation site to remove any dirt, debris, or grease. This will ensure a proper fit and prevent corrosion.
Step 2: Positioning the Pipe Supports
Once you have completed the planning and preparation, it's time to position the insulated pipe supports on the overhead pipes. Here's how you can do it:
- Mark the Support Locations: Use a measuring tape and a marker to mark the locations where the pipe supports will be installed. Ensure that the supports are evenly spaced and aligned with the piping system design.
- Install the Hangers or Brackets: Depending on the type of pipe supports, install the hangers or brackets on the overhead structure. Use the appropriate tools and fasteners to secure the hangers or brackets in place.
- Position the Pipe Supports: Place the insulated pipe supports on the hangers or brackets. Ensure that the supports are centered and aligned with the pipes.
- Check the Alignment: Use a level to check the alignment of the pipe supports. Make any necessary adjustments to ensure that the supports are level and plumb.
Step 3: Securing the Pipe Supports
After positioning the pipe supports, it's important to secure them properly to prevent movement or displacement. Here are the steps to follow:
- Tighten the Bolts and Nuts: Use a wrench to tighten the bolts and nuts on the pipe supports. Ensure that the bolts are tightened to the recommended torque specifications.
- Install the Washers: Place washers between the bolts and nuts to prevent loosening and provide additional support.
- Check the Tightness: After tightening the bolts and nuts, check the tightness of the pipe supports. Make any necessary adjustments to ensure that the supports are securely fastened.
Step 4: Insulating the Pipe Supports
Insulating the pipe supports is an important step to prevent heat loss and reduce energy consumption. Here's how you can do it:
- Select the Right Insulation Material: Choose an insulation material that is suitable for the pipe temperature and operating conditions. Common insulation materials include fiberglass, mineral wool, and foam insulation.
- Cut the Insulation Material: Use a utility knife to cut the insulation material to the appropriate size and shape. Ensure that the insulation material covers the entire surface of the pipe supports.
- Install the Insulation Material: Wrap the insulation material around the pipe supports and secure it in place using tape or straps. Ensure that the insulation material is tightly packed and there are no gaps or voids.
- Seal the Joints: Use a sealant to seal the joints between the insulation material and the pipe supports. This will prevent air leakage and improve the insulation performance.
Step 5: Testing and Inspection
Once the installation is complete, it's important to test and inspect the insulated pipe supports to ensure that they are functioning properly. Here are the steps to follow:

- Check the Pipe Movement: Check the pipe movement to ensure that the insulated pipe supports are allowing for proper expansion and contraction. Make any necessary adjustments to the supports if there is excessive movement.
- Inspect the Insulation: Inspect the insulation material for any damage or deterioration. Replace any damaged or deteriorated insulation material to maintain the insulation performance.
- Test the Thermal Performance: Use a thermal imaging camera or a temperature sensor to test the thermal performance of the insulated pipe supports. Ensure that the temperature difference between the pipe and the surrounding environment is within the acceptable range.
- Check the Alignment and Levelness: Check the alignment and levelness of the pipe supports to ensure that they are still in the correct position. Make any necessary adjustments if there are any changes in the alignment or levelness.
Conclusion
Installing insulated pipe supports on overhead pipes is a complex but important task that requires careful planning, preparation, and execution. By following the steps outlined in this blog, you can ensure that the insulated pipe supports are installed correctly and provide the necessary thermal insulation and mechanical support for the piping system. If you have any questions or need further assistance with the installation of insulated pipe supports, please don't hesitate to contact us. We are a leading insulated pipe support supplier and we are committed to providing high-quality products and excellent customer service. We look forward to working with you to meet your piping system needs.
References
- ASME B31.1 - Power Piping
- ASME B31.3 - Process Piping
- ASTM C547 - Standard Specification for Preformed Pipe Insulation
- ISO 12241 - Thermal Insulation - Determination of Steady-State Thermal Transmission Properties - Pipe Insulation